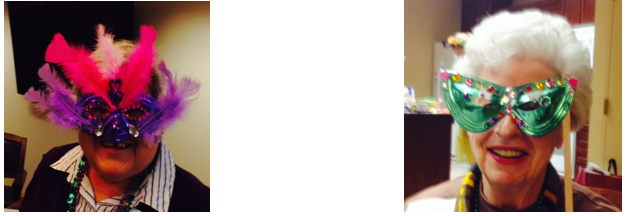
Mardi Gras Masks
Mardi Gras Masks
A Lesson Developed and Submitted by Cathy Harrington and Marilyn Stadler
Objectives:
1. Introduce the art of mask making to the participants.
2. Review the art concepts of formal and informal balance and shape.
3. Celebrate Mardi Gras by creating masks using imagination and the materials provided.
Audiences:
Could be suitable for all ages to enjoy.
Learning Opportunity: (optional)
Throughout time, masks have been worn for performance, entertainment, disguise, concealment, or protection. They have been around since ancient times and have been used in ceremony, storytelling, and dramatic enactment. Making a mask invites you to explore the persona you reveal or conceal from the world. Actors of Ancient Greece wore masks on stage to convey exaggerated emotions. Many cultures created and buried death masks with corpses of prominent people.
Those celebrating Halloween and the Mexican Day of the Dead wear masks to ward off fear or honor the dead. Ceremonial overtones of death, chaos and laughter can also be symbolized in masks. Mardi Gras, or Fat Tuesday, can be traced back to medieval Europe and arrived in the North America via a French-Canadian Explorer. The first Mardi Gras celebration in what is now Louisiana took place in 1703. Mardi Gras is a carnival celebration that dissolves the usual boundaries of polite society in favor of raucous over-indulgence. Traditionally, people wear masks on carnival days to allow role reversal and outrageous behavior. Historically, masks allowed people of lower classes to mix undetected with aristocrats, men to dress as women, humans to look like animals, all of which would have been considered taboo outside the carnival season. (To learn more about the history of Mardi Gras, visit http://www.mardigrasneworleans.com/history.html.)
Mardi Gras events are hosted by the Krewe, elite social clubs in New Orleans who organize the parades and private parties associated with the holiday. Krewe members wear masks on the floats to hide their identities. Official Mardi Gras colors---purple, green and gold---were chosen by the Krewe of the Rex parade in 1872. Purple symbolizes justice, green means faith, and gold represents power. These colors often feature on Mardi Gras masks More ornate masks will cover the entire face and head. They are often decorated with feathers, jewels and glitter to convey the sense of flamboyant over- indulgence associated with Mardi Gras. Some masks cover only the eyes; others leave the mouth exposed. Source: http://www.ehow.com/facts_5475331_mardi-gras-mask-history.html
Supplies/Materials:
Metallic paper card stock cut into 12x16” pieces for those who wish to construct a mask form from scratch and simple plastic eye masks for those who wish to complete a less complicated project--(masks can be purchased (in white or in colors) at Hobby Lobby, Nobbies or Michaels or at art supply companies such as Dick Blick)
- Colorful feathers
- Craft paint
- Markers
- Beads
- Glitter
- Scissors
- Sequins
- Appliques
- Ribbons
- Pipe cleaners
- Jewels/gems
- Hole punch
- Stapler with staples
- Elmer’s glue
- Hot glue guns
Class Instruction:
1. Prior to the class, lay down newspaper to cover the tables and place all the mask materials out for the participants’ use. Warm up glue guns a minimum of 7-10 minutes. Warn participants to be careful when using the glue gun.
2. Optional: talk about the history and art of masks. Explain the project you will be undertaking.
3. Show the participants examples of Mardi Gras masks.

Mask Examples
4. Explain to the participants that they have the option of creating a Mardi Gras mask from scratch or they can they can decorate a plain mask provided by the facilitator.
5. If creating a mask from scratch, cut the metallic card stock into 12” x 16” pieces.
6. Fold the card stock in half lengthwise and trim paper to make it into an oval shape.
7. Cut a “v” in the top and bottom at the fold.
8. To make the mask three dimensional, overlap the top sections and bottom sections and staple to form a mask.
9. Once the masks have been formed, it’s time to decorate
10. Encourage the participants to arrange sequins, feathers and other embellishments on the mask before adding glue.
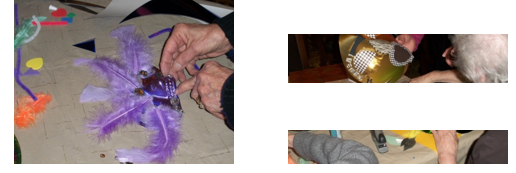
11. The participants can add a small drop of glue from the glue gun to the feathers, beads, etc. to apply them to their masks. They can also use Elmer’s glue to apply glitter and lighter embellishments. (Note the Elmer’s glue will take longer to dry than the glue gun.)

Embellishing
12. If necessary, have the participants add a ribbon tie to their masks.
- Punch two holes on the outer ends of the mask.
- Cut two strips of ribbon to tie the mask to their heads. Both pieces of ribbon should be a minimum of 12 inches in length.
- Loop one end of the ribbon into each hole to secure the tie.
- If a plastic mask is used, add a drop of hot glue to the opposite ends of the mask to secure the ribbon.
At the Conclusion of the Class:
At the conclusion of the exercise, ask each participant to share their mask with the entire group, explain what materials they used to decorate their mask and any art elements they incorporated into their designs. Take a group picture to share the fun.
Fun Extras:
Have your own Fat Tuesday celebration with the participants. Encourage everyone to wear Mardi Gras beads and costumes (if they have them) to accompany their masks and then have your own parade. Consider serving Mardi Gras King Cake as a sweet treat. (You can find a recipe for King Cake at http://allrecipes.com/Recipe/Mardi-Gras-King-Cake/ )
Additional Suggestions for this Lesson from Art Therapist Christine Hennig:
Here are a few extra suggestions I’d like to add:
- Do a search on Google Images for “mask templates” and you’ll find lots of great templates for masks in different shapes. Print these on cardstock and cut them out to make templates to trace around. (For example, visit: http://www.activityvillage.co.uk/mask-templates )
- Craft foam is another material option for making the masks. It’s very easy to work with and some foam is even embellished with glitter.
- Tacky glue may be easier to work with than Elmer’s for this project. Hot glue is fine although it is always necessary to exercise caution to avoid injury. I have also found staplers work well for attaching embellishments such as feathers to the masks.
- I like to use elastic cord (which can be found in the jewelry-making sections of most craft stores) for attaching the masks to the head. Use a one-hole punch to make holes on either side of the mask at about the level of the eye holes. Cut a piece of elastic cord that’s about 12” long and tie each end to the hole in each side of the mask. It will seem like it is too short, but the cord stretches and it will actually fit most people’s heads.
- You can make goofy antennae on your mask by punching a hole with a one-hole punch above each eye hole then taking a pipe cleaner and twisting it through each hole. You can make the antenna squiggly by wrapping the pipe cleaner around a pen or a pencil and you can add a bead or a button to the top.
-
I’ve used this format to make Halloween masks.
Foam Halloween stickers are great for decorating these masks. Other embellishments to try are small flat
plastic Halloween toys (spiders, ghosts, etc.) that you can attach to the mask
with a stapler.
