
Recycled Book Boxes
Recycled Book Boxes
(art + literature)
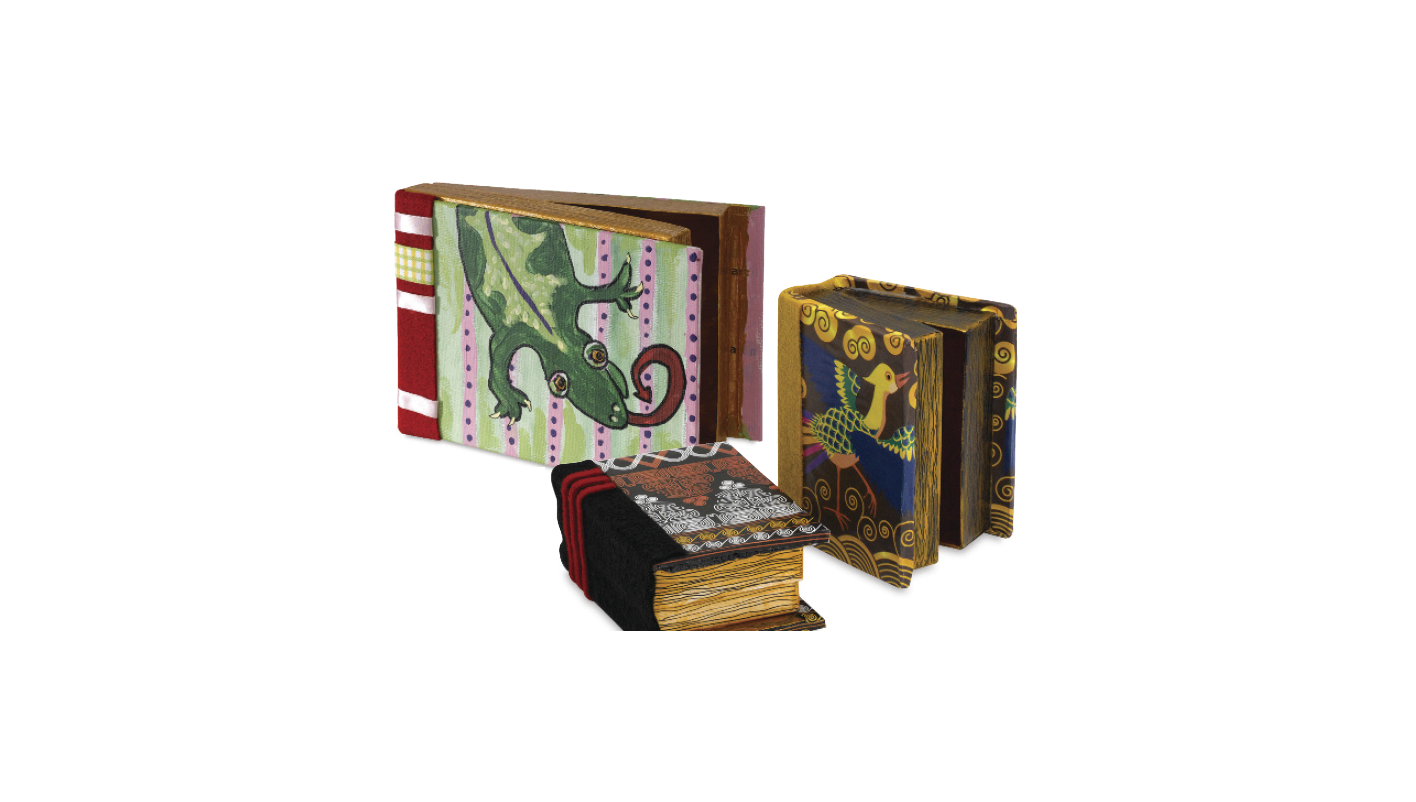
Examples
Rather than traditional pages, the interior of these “books” will hold objects collected by students. An “art box” book could contain samples of texture, color, form, and line or other examples of design elements or styles. Or a more personalized box “about me” could hold a collection of tiny photos, poems and small keepsakes. Students explore the anatomy of a book as they assemble these book boxes.
Grade Levels 3-12
Note: instructions and materials based on a class of 25 students. Adjust as needed.
Preparation
1. Ask students to collect jewelry or gift boxes 2" x 3" up to 5" x 7" for recycling into a book box.
2. Determine the subject of book boxes and discuss type and size of contents (small!). Begin collecting objects.
3. Discuss bookbinding techniques. You might begin by asking students to take a book from their desk or book bag and name the various parts of a book.
Materials
Economy Canvas Panels, class pack of 24, 4" x 4" or larger; need two per student
Craft and Fabric Glue, 4-oz bottle; share 18 across class
Decorative papers, recommend: Decorative Papers, “Around the World” set of 96 sheets, 8-1/2" x 11"; share two pkgs across class
Thai Unryu Paper asst. colors, 25" x 37",; need one sheet
Thai Mango Paper, asst. colors, 25" x 37",; need one sheet
Thai Banana Paper, asst. colors, 25" x 37", ; need one sheet
Metallic Acrylics, 8-oz Antique Gold; share two bottles across class
Fine Point Markers, Black; share 12 across class
Acrylic Felt 100 piece assortment, 9" x 12"; share one package across class
Scissors, pointed, need one per student
Bent Scissors, 3-3/4" cut, share three across class
Optional Materials:
Ribbon Rainbow, asst.; share two pkgs across class
Process
1. The cover will be created with Blick Economy Panels, 2 per student. Trim panels as needed with a utility knife so they are 1/2" bigger than the box dimensions. When attached, panels should extend 1/4" beyond the box on the front, top and bottom edges. The edge opposite the back binding will extend a little more to the front. The back three sides will also be a little bigger but the difference will not be obvious. Cut panel edges will be covered with decorative paper.
2. To wrap the front and back book covers, trim two pieces of decorative paper 1-1/2" bigger than the two cover panels. Brush glue onto one side of each panel and extending to the edges.
3. Line up the paper edge with the back panel edge with excess paper extending over the other three sides. Use the palm of a hand to rub the paper firmly in a circular motion to adhere it to the panel. Set aside to dry.
4. Paint the inside of the box and all box edges with acrylic paint. Gold or dark red are suggested to imitate fine and rare collector editions. When dry use a black marker to draw slightly wavy lines around three sides (top, bottom and front) to look like “faux” page edges.
5. Return to the front and back covers of the book. Place them paper side down on the table. Apply glue to the edges of the board and the uncovered side. Wrap the paper around the edge and secure the excess paper to the uncovered board. Fold over the two corners. Add a little glue to secure the fold.
6. Brush glue onto the box top. Place the back unpainted edge on the inside unfinished piece of the panel. Leave 1/4" around the open 3 book edges. Push the box to the unfinished edge at the “spine”. This should make the box look finished except for the spine of the book. Glue the other two parts - box and book panel - together. Let dry.
7. Place the book box together. Measure the space at the back spine of the book and select a felt color for the binding. The length of felt from the top to the bottom of the book should be cut exact. The part to bind from the front and back can vary and should cover at least 1/2" of the front and the back covers – add 1” to the difference between the two covers.
8. Place glue on the 1/2" of the cover at the spine. Gently apply the felt. Turn the book box over, add glue to the book edges and wrap felt over the back of each book. The felt is stretchy and can be adjusted a little if needed.
9. Finish the book box by adding designs to the binding or the cover of the book box.
Options
1. Look for unusual boxes such as a small round cheese box.
2. Use different cover materials such as two CDs or any two flat items.
3. Add a latch to the book or a ribbon book mark. Embellish as desired.
National Standards
Content Standard #2 Using knowledge of structures and functions
K-4 Students use different media, techniques, and processes to communicate ideas, experiences, and stories
5-8 Students select and use the qualities of structures and functions of art to improve communication of their ideas
9-12 Students demonstrate the ability to form and defend judgments about the characteristics and structures to accomplish commercial, personal, communal, or other purposes of art
Content Standard #3 Choosing and evaluating a range of subject matter, symbols and ideas
K-4 Students select and use subject matter, symbols, and ideas to communicate meaning
5-8 Students use subjects, themes, and symbols that demonstrate knowledge of contexts, values, and aesthetics that communicate intended meaning in artworks
9-12 Students apply subjects, symbols, and ideas in their artworks and use the skills gained to solve problems in daily life
Content Standard #6 Making connections between visual arts and other disciplines
K-4 Students identify connections between the visual arts and other disciplines in the curriculum
5-8 Students describe ways in which the principles and subject matter of other disciplines taught in the school are interrelated with the visual arts
9-12 Students compare characteristics of visual arts within a particular historical period or style with ideas, issues, or themes in the humanities or sciences