ETL Using Pentaho(Spoon)
SCD Type 1:
New information simply overwrites the original information, don't keep old history or previous value of the record. This is the default type of dimension table or any table. if the table is updated do not need to specify any additional information to create a Type 1 SCD. It means no need of additional column in the dimension table.
This type is more useful whenever easy to maintain and is often use for data which changes are caused by processing corrections
e.g.
removal special characters
correcting spelling errors
incorrect mark entry in the student table.
After Appeal or Re_total or Repeating course mark may change.
Disadvantages:
All history to be lost. By applying this methodology, it is not possible to trace back in history. For example, in this case, it is not possible keep track what is the previous mark of the Sid 13, it will keep only the latest mark value.
Insert New Records
| Sid | Sname | Mark1 | Grade | Result |
| 11 | Ambu | 89 | A | Pass |
| 12 | Meenu | 75 | B | Pass |
| 13 | Jasica | 45 | D | Fail |
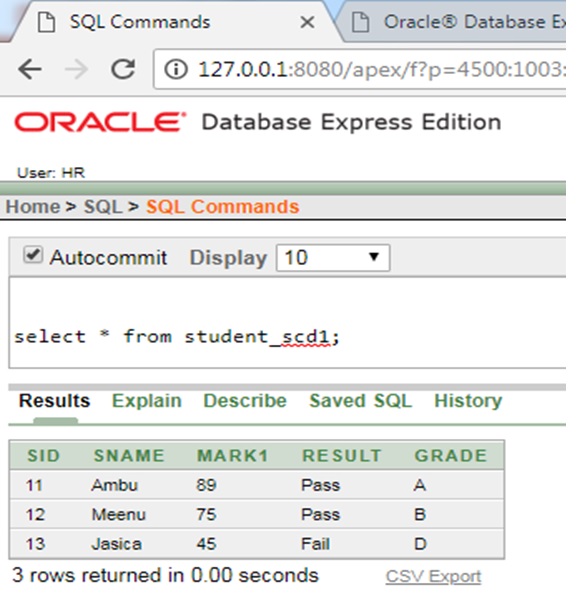
Step 1: Using above data create student_scd1 table in oracle xe
create table student_scd1(sid number(5) not null,sname varchar2(15),mark1 number(5),result varchar2(10),grade varchar2(3));
insert into student_scd1 values(11,'Ambu',89,'Pass','A');
insert into student_scd1 values(12,'Meenu',75,'Pass','B');
insert into student_scd1 values(13,'Jasica',45,‘Fail',‘D');
select * from student_scd1;
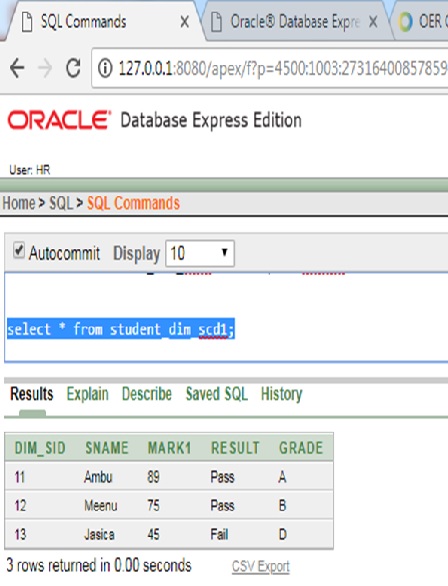
Step 2: Create Student_dim_scd1 dimension table and insert the same values
create table student_dim_scd1(dim_sid number(5) not null, sname varchar2(15),mark1 number(5),result varchar2(10),grade varchar2(3));
insert into student_dim_scd1 values(11,'Ambu',89,'Pass','A');
insert into student_dim_scd1 values(12,'Meenu',75,'Pass','B');
insert into student_dim_scd1 values(13,'Jasica',45,'Fail','D');
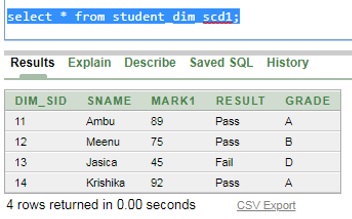
select * from student_dim_scd1;
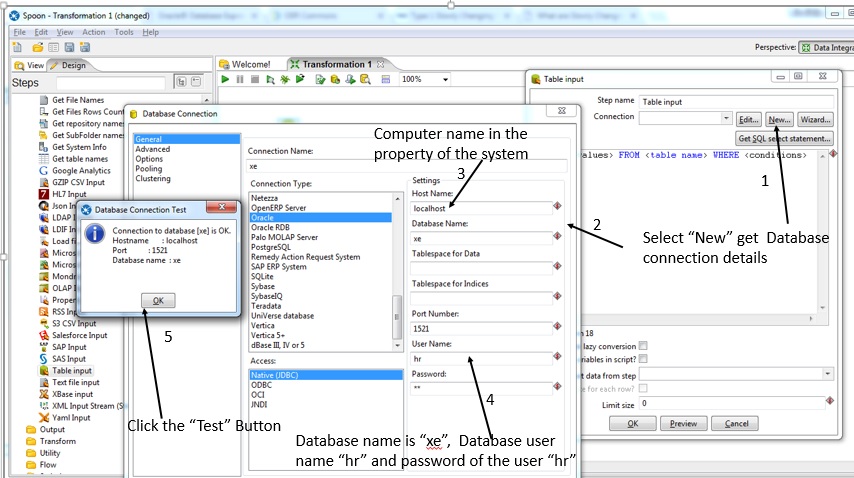
Step 6: In the Database connection new-->connection name "xe"--> Host name "local host" (system name it will differ computer-to-computer)->connection type=oracle-->Access="Active JDBC" --press the "Test" Button
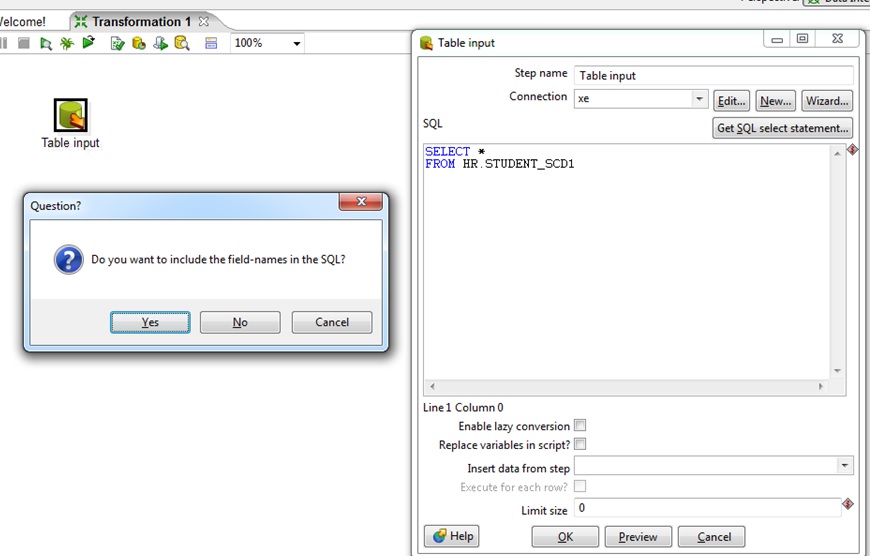
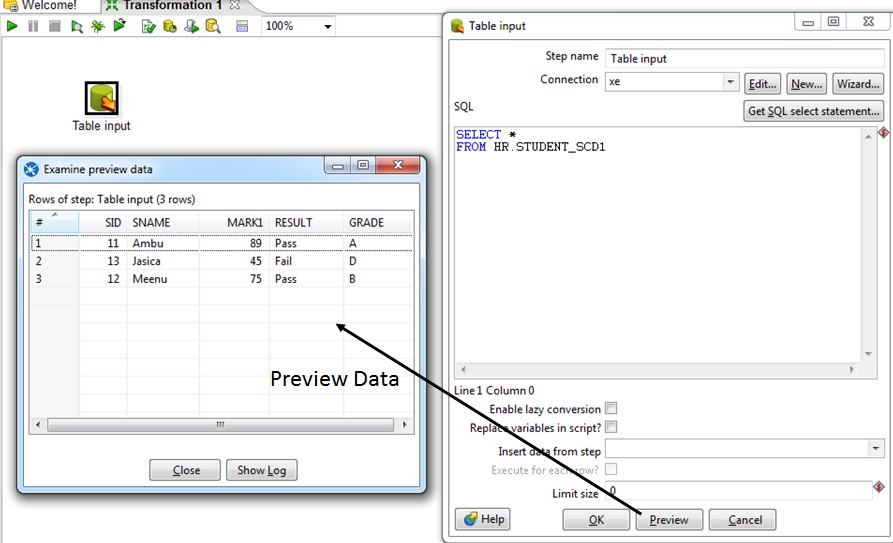
Step 7 : Include the "SQL" statement with filed name or use * to include all the fields of the student_scd1 table.
Step 8 : Preview the data of SQL statement
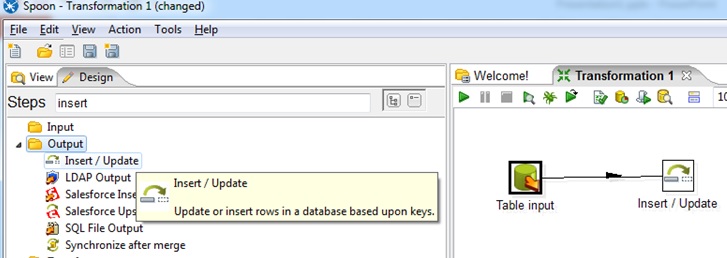
Step 9: Select "insert/update" output and drag and place in the transformation
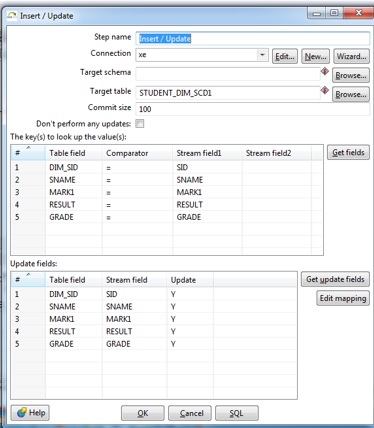
Step 10: Right Click the "Insert/Update" and fill the "Student_dim_scd1" dimension table information as given below
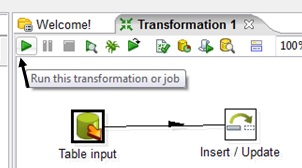
Step 11: Run the Transformation
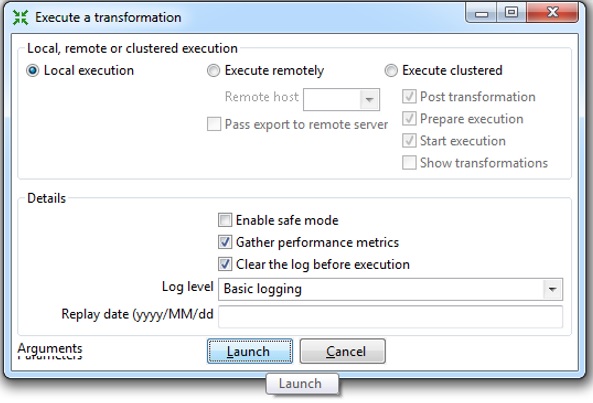
Step 12: It will show "Launch" screen
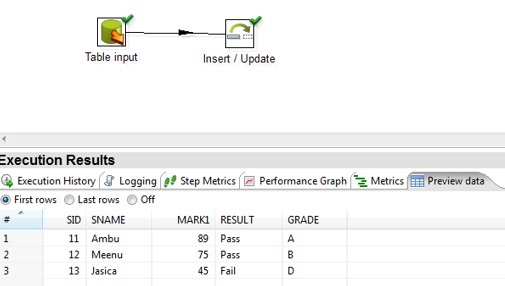
Step 13: It will show the Execution Result
Step 14: preview the latest Data
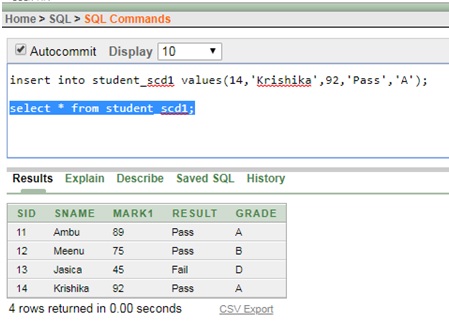
Step 15: Now start SCD in the dimension, insert record in the base table student_scd1
Step 16: After insert in the oracle xe and run the transformation it automatically update the inserted record field in the student_scd1 table.
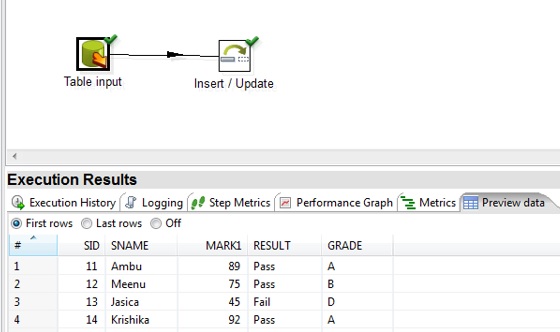
Step 17: Check the Execution Result
Step 18: In table student_dim_scd1 it automatically insert the new records
Exercise 1:
create table employ1(eid number(5) not null,ename varchar2(15),salary number(5));
insert into employ1 values(1001,'Alaa',1800)
insert into employ1 values(12,‘Ravi',1500);
select * from employ1;
create table emp_dim_scd1(dim_eid number(5) not null, ename varchar2(15),salary number(5));
insert into emp_dim_scd1 values(1001,'Alaa',1800)
insert into emp_dim_scd1 values(12,‘Ravi',1500);
select * from emp_dim_scd1;
Instruction :
•Create employ1, emp_dim_scd1 table in oracle_xe.
• Using Spoon, include “table input” connect employ1 table,
•“insert/update” tag include emp_dim_scd1 dimension table, run the transformation and execute the result
• Insert into employ1(13,’Rajaa’,2400); record in the employ1 table, again execute the result in spoon
•Display emp_dim_scd1 dimension table newly inserted row details are included.
