Introduction to VR in Unity & Unreal
Unity is different from Unreal where instead of creating blue print/code elements, it is instead set in the project file/folder itself. For many this may feel a lot more user friendly for a 'from scratch' approach. However, like its Unreal counterpart, the controls still have to be implemented, and the HMD is the primary source of control and interaction in the VR environment.
Creating a VR Project
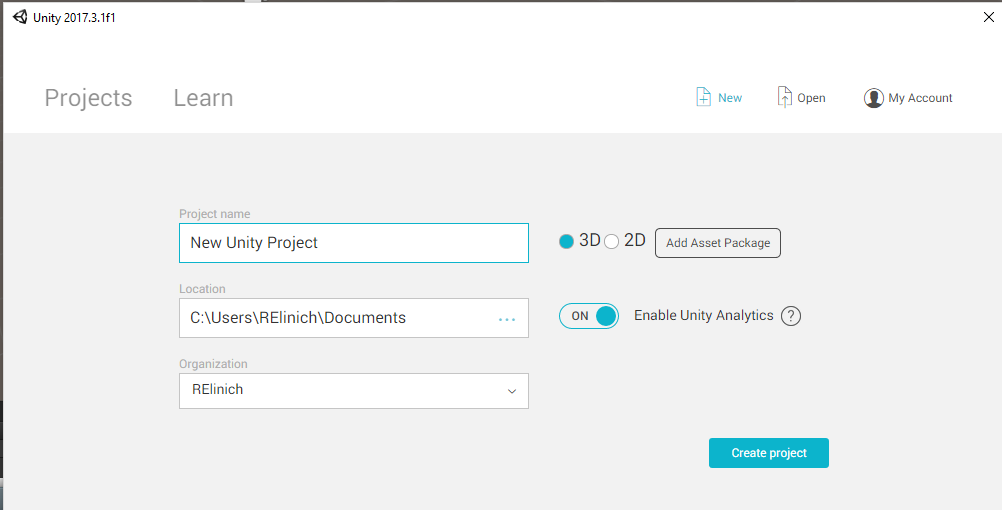
Unity provides options for changing its game type on the fly in comparison to Unreal. Similar to Unreal, Unity begins with a pop-up window asking where you would like to save the project and what its name should be. For starting out and getting the hang of the Unity file organization, keep to 3D and do not import any assets. One thing to point out about assets is like Unreal, Unity provides the capabilities to add more later. This can help avoid project bloat and keep the folder size down.

New Project window for Unity
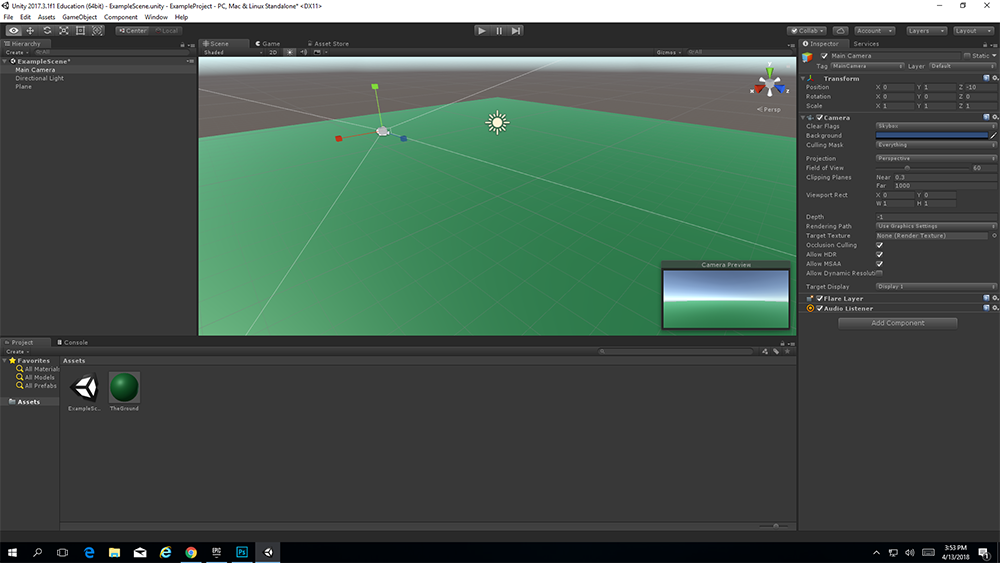
You are then shown the base of the main project to begin working in -

Unity Interface Example
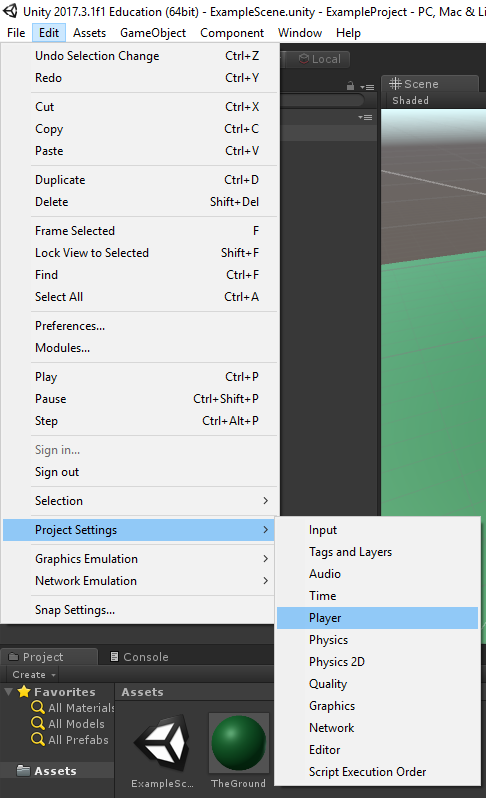
Once the project is created, you can then set up the player element to be able to utilize VR, which is found under Edit > Project Settings > Player

Location of Player edit for VR Implementation in Unity
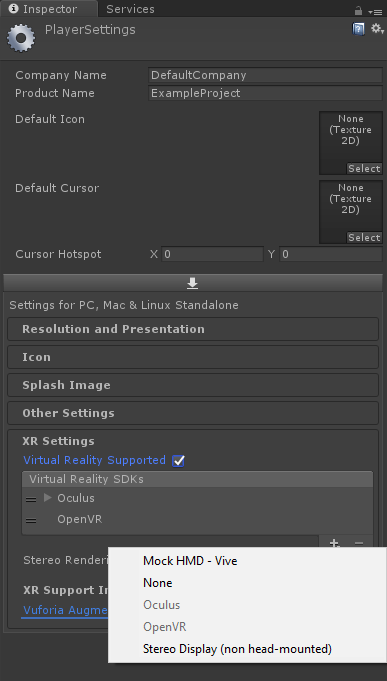
In the Player settings, VR will have to be activated and the type of VR needs to be set as well!

Setting up VR Support in Unity
Unity will go down the list and begin to process the Rendering options and which of the VR options will work with the attached display (Note: OpenVR also works for the Vive). Once this is set up you are ready to test your project using the VR Headset to look around and see the end result.